

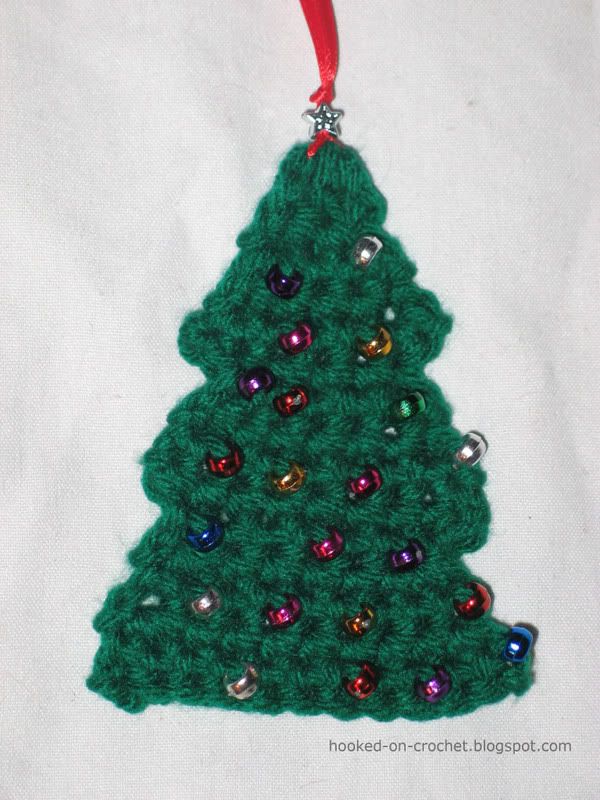
I was playing around with my tree pattern last night and tried making it in worsted weight yarn with pony beads and an "H" hook. I have to say, I'm really pleased with the way they came out and they are MUCH easier and faster to make than the thread version.
I'm making a bunch of these for Christmas Cards this year (ignore that EA folks!)
The pattern is the same as for the bookmark.
The only change that I made was in starting.
Worsted Weight Tree Ornament Pattern
Thread the star (or whatever you want to use for the top) charm on to the ribbon with both loose ends of ribbon on top. Tie loose ends together leaving the charm in the center of the ribbon (you will have a loop of ribbon above and below the charm).
As with the original version - thread more beads than you think you will need on the yarn before you start crocheting. As you work in the Back Side Facing rows, pull up beads at random. They will be anchored to the front of your tree as you work.
Row 1: Attach yarn to the bottom ribbon loop with a slip stitch, Chain 3, 2 DC (3 DC) Chain 1, turn
Row 2: (front side facing) sc in each stitch across (3 sc) ch 1 turn
Row 3) (back side facing) 2sc in first stitch, 1 sc in next, 2 sc in last stitch (5sc) ch 1, turn
Row 4) (front side facing) 1 sc in each stitch across (5 sc) ch 1 turn
Row 5) (back side facing) 2 sc in first stitch, 1 sc in next 3, 2 sc in last stitch (7 sc) ch 1 turn
Row 6) (front side facing) 1 sc in each stitch across (7sc) Turn
Row 7) (back side facing) slip stitch in first two stitches, chain 1, sc in next 4 stiches, leave last stitch unworked (5sc) ch 1, turn (by slip stitching in first two you will have a cleaner break between tree layers)
Row 8) (front side facing) sc across (5 sc)
Row 9) (back side facing) 2sc in first stitch, sc in next 3, 2 sc in last (7 sc) ch 1 turn
Row 10) (front side facing) 1 sc across (7 sc)
Row 11) (back side facing) 2sc in first stitch, sc in next 5, 2 sc in last (9 sc) ch 1 turn
Row 12) (front side facing) 1 sc across (9 sc)
Row 13) (back side facing) slip stitch in first two stitches, chain 1, sc in next 6 stitches, leave last stitch unworked (7sc) ch 1, turn
Row 14) (front side facing) 1 sc across (7 sc)
Row 15) (back side facing) 2sc in first stitch, sc in next 5, 2 sc in last (9 sc) ch 1 turn
Row 16) (front side facing) 1 sc across (9 sc)
Row 17) (back side facing) 2sc in first stitch, sc in next 7, 2 sc in last (11sc)
Row 18) (front side facing) 1 sc across (11 sc) finish off and weave in end
Weave in loose end at top. Push start charm down against the yarn and secure with a knot in the ribbon.
You're done! It's ready to hang on the tree or decorate a package.
Note: The trees might curl slightly - I tried using a larger hook and it did curl a bit less. You may need to block these. I found if I just layed them flat or pressed them under a book for a short while, mine were fine. :)
If you make these, I'd love to see pictures!

0 Comments:
Post a Comment
<< Home